
OUI / DUI Defense
Steps to Remove Your Ignition Interlock Device Successfully

Introduction
For many, the journey to remove an ignition interlock device can feel daunting, especially when the desire to drive freely is so strong. Understanding the specific requirements and steps involved is crucial for a smooth transition back to the road. However, many individuals may find themselves questioning what exactly is needed to successfully complete this process and avoid potential pitfalls. With the right information and support, you can navigate this process confidently and reclaim your driving freedom.
Charged? Talk to Attorney Reinhardt.
Leave a name and a number — he reviews every request personally.
Understand Removal Requirements
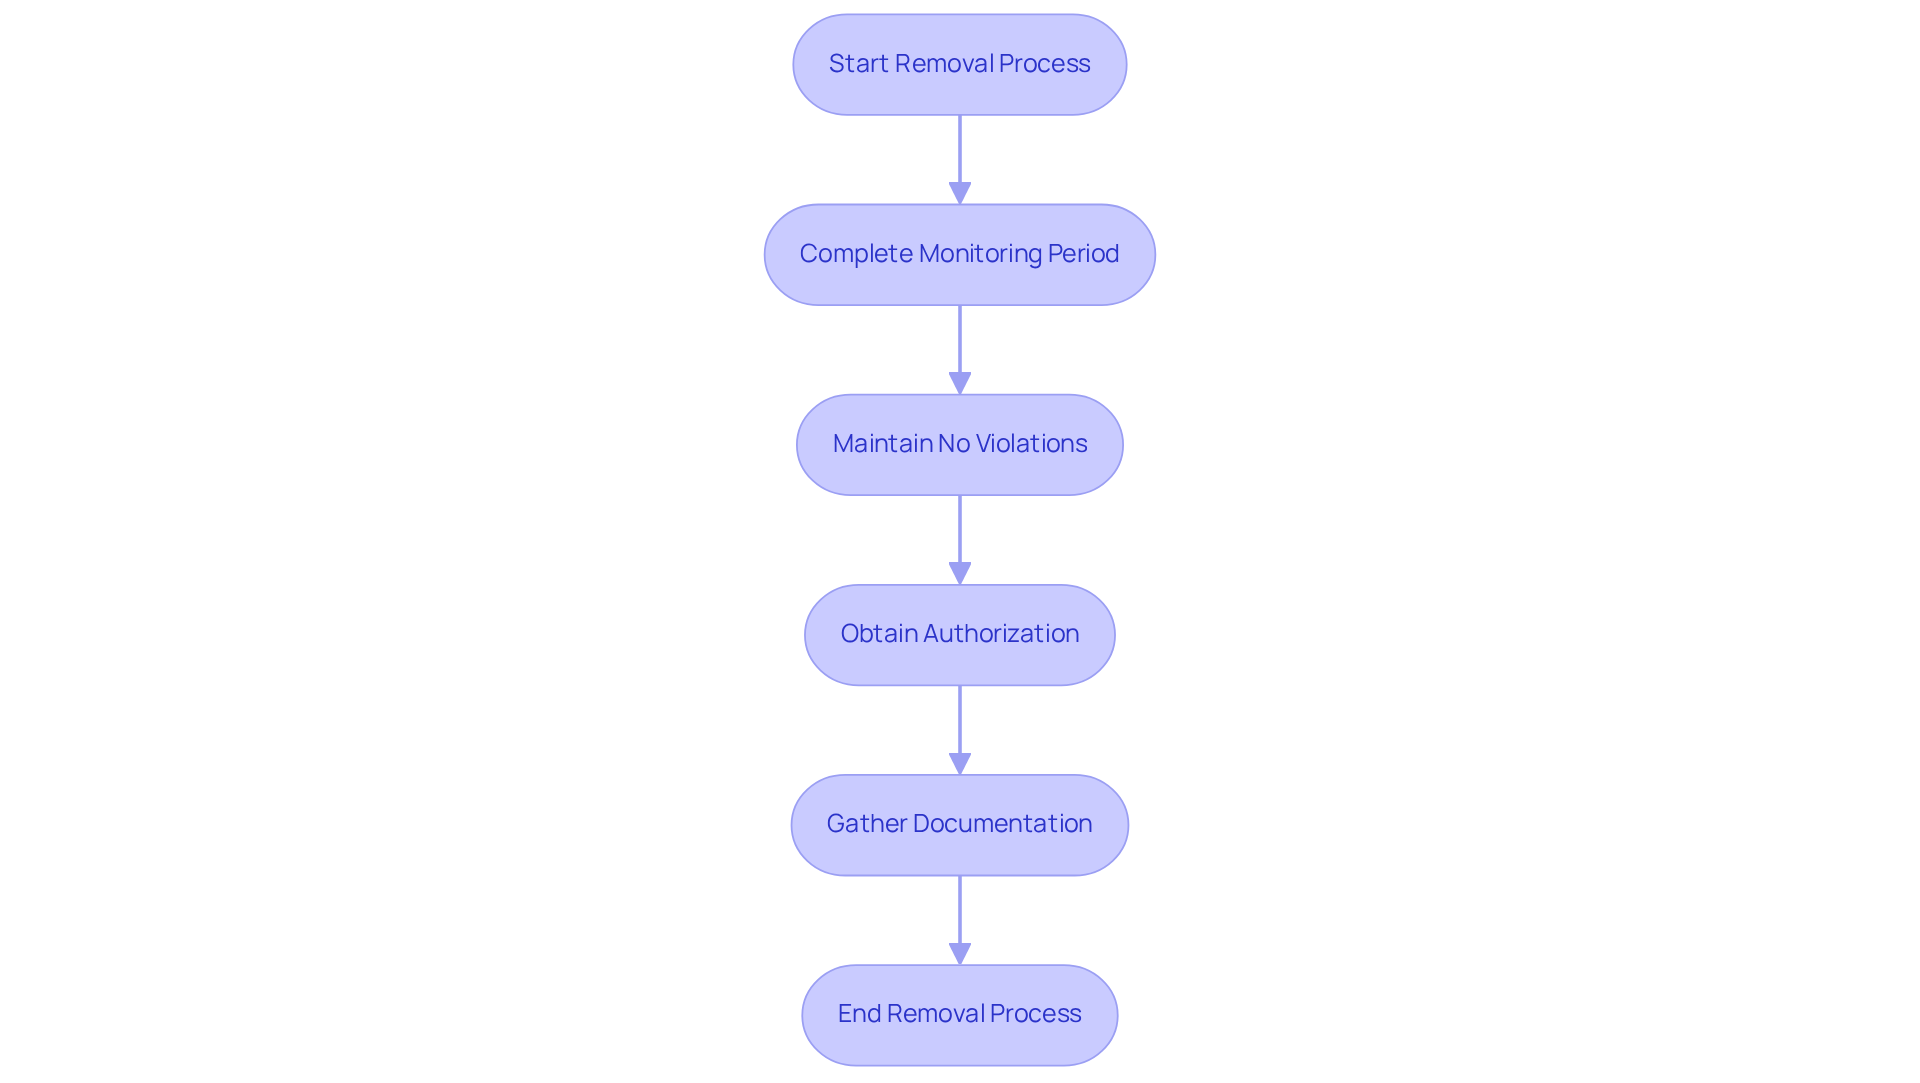
Facing the prospect of learning how to remove ignition interlock device can be daunting, but understanding the requirements can ease your journey. Before starting the elimination process, it’s important to know what your state or local jurisdiction requires. Generally, these requirements include:
- Completion of the Monitoring Period: Make sure you’ve completed the necessary time with the device installed, which can feel like a long road, but it’s a crucial step toward moving forward. Typically, this is a minimum of six months for first-time offenders with a blood alcohol concentration (BAC) of 0.15 or higher or if a minor was present in the vehicle. For second DUI convictions, the IID must remain installed for at least one year, or two years if the BAC was 0.15 or higher or a minor was present. As of January 1, 2026, AB 366 will require first-time DUI offenders to install an IID following conviction.
- No Violations: It’s essential to maintain a clean record throughout the monitoring period. This means no failed breath tests or tampering incidents. Each violation is recorded, and repeated offenses can complicate the process of regaining your driving privileges. Keeping a clean slate can feel challenging, but it’s vital for your progress.
- Authorization: You’ll need to obtain written authorization from the court or your monitoring authority. This may involve submitting a request or application for elimination, ensuring that all legal requirements are met before proceeding. For second-offense DUI convictions, an IID is required as a condition of probation. Knowing you have the right permissions can provide peace of mind.
- Documentation: Gather the important documents that show you’ve met all the requirements; this will help you feel prepared and confident. This documentation is essential for verifying that you have adhered to all mandated conditions. Additionally, the IID must be installed by a state-approved vendor before a driver’s license can be reinstated.
By comprehending these requirements, you can take confident steps toward regaining your driving freedom. With clarity on these requirements, you can approach how to remove ignition interlock device confidently and with peace of mind.
Schedule Your Removal Appointment
Facing how to remove ignition interlock device can be a stressful experience, but it doesn’t have to be. Follow these steps to make the process smoother and less daunting:
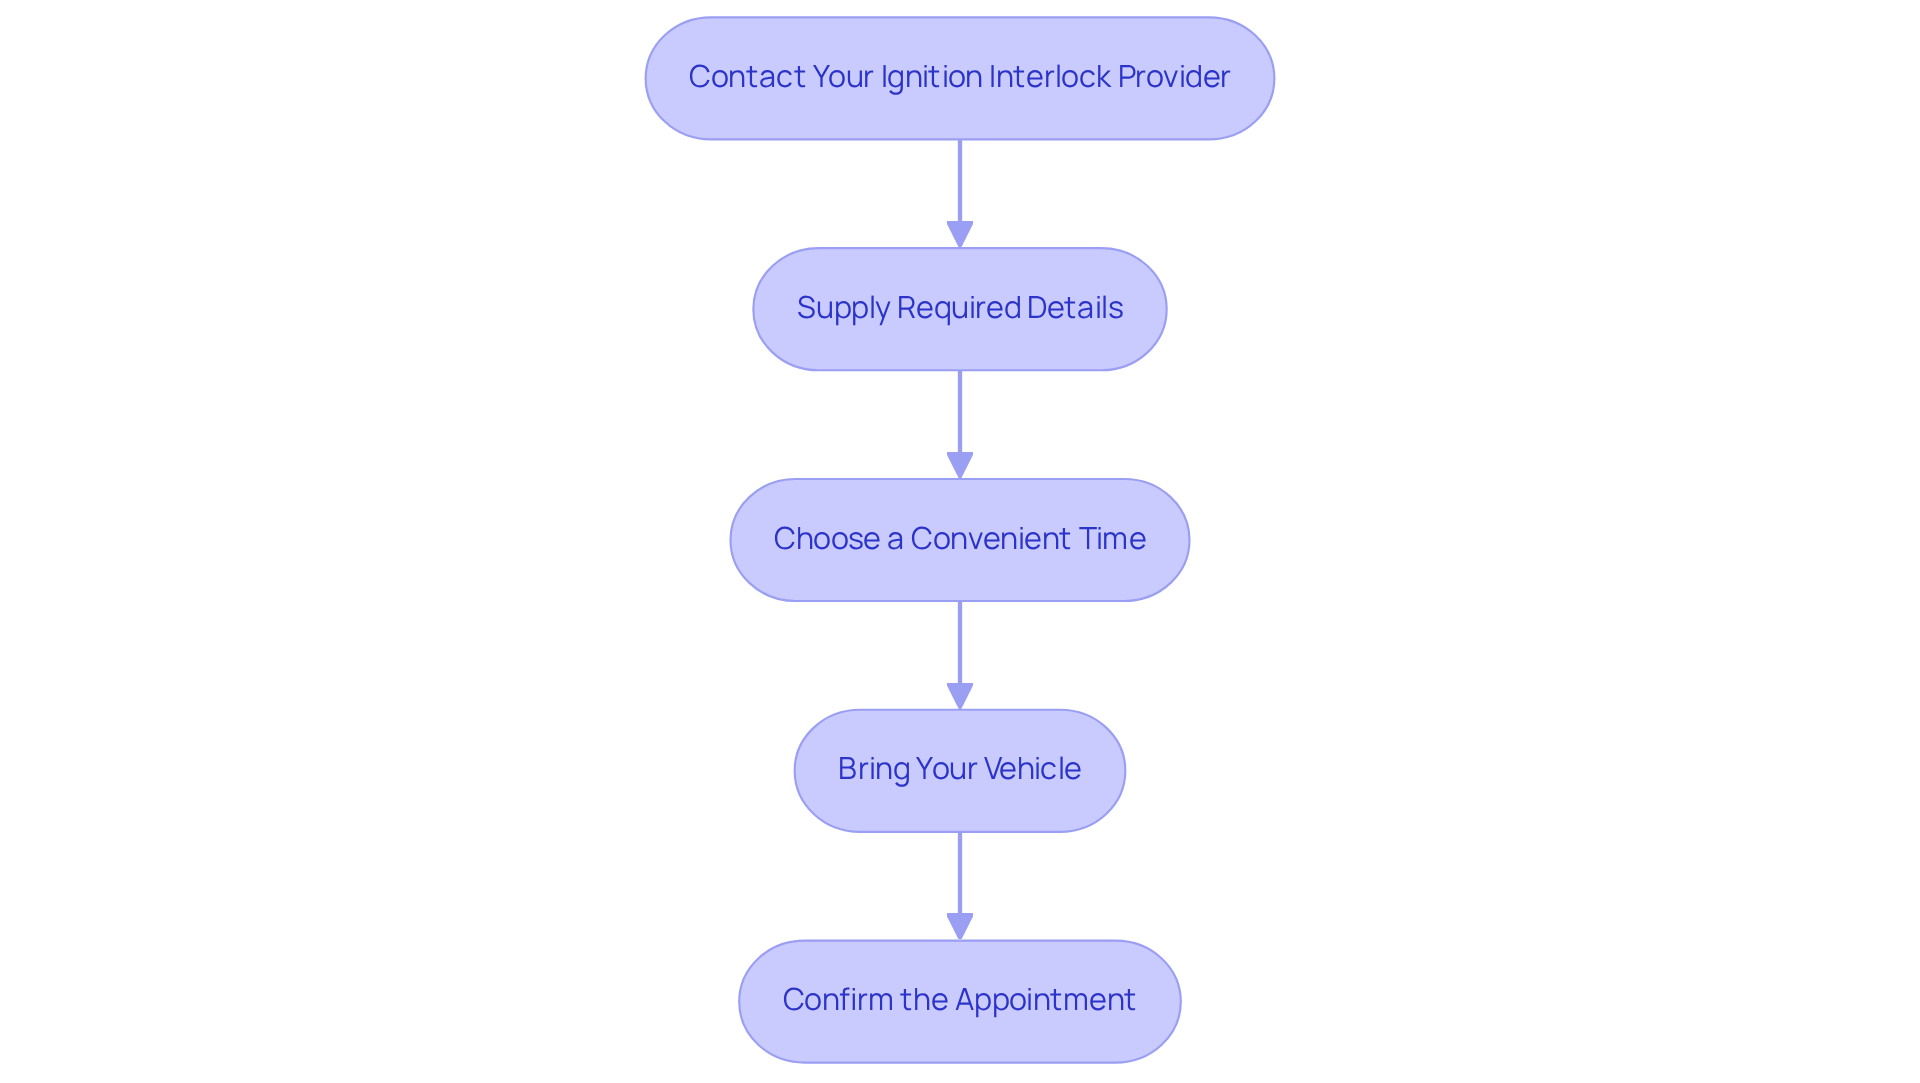
- Contact Your Ignition Interlock Provider: Reach out to the company that installed your system, which can typically be done via phone or their website. This initial step can help ease your worries about the process ahead.
- Supply Required Details: Be ready to provide your identification, the equipment serial number, and any paperwork that demonstrates your eligibility for extraction. Having these documents handy can help you feel more prepared.
- Choose a Convenient Time: Schedule an appointment at a time that works for you. Removal appointments usually take about 30 minutes, but the entire process typically takes less than one hour, depending on your vehicle’s make and model. Picking a time that suits you can alleviate some of the stress.
- Bring Your Vehicle: Make sure you bring the car equipped with the ignition lock to the service location for removal. This is an important step, so don’t forget it!
- Confirm the Appointment: Ensure you receive confirmation of your appointment, including the date, time, and location. This confirmation can provide peace of mind as you prepare for the next steps.
By scheduling your appointment promptly, you can help you feel more in control and on track to understand how to remove ignition interlock device and reclaim your driving freedom. Returning to the service center that installed your ignition system can help make the process smoother and quicker, easing your concerns. Remember, successful fulfillment of the program, which usually necessitates a violation-free duration of approximately 90 days, is crucial before arranging your appointment for disconnection. Tampering with the ignition control system is not allowed and may result in severe legal repercussions.
Complete the Removal Process
You might be feeling anxious about how to remove the ignition interlock device and what the process entails. To ensure a smooth extraction, here are some essential steps to follow:
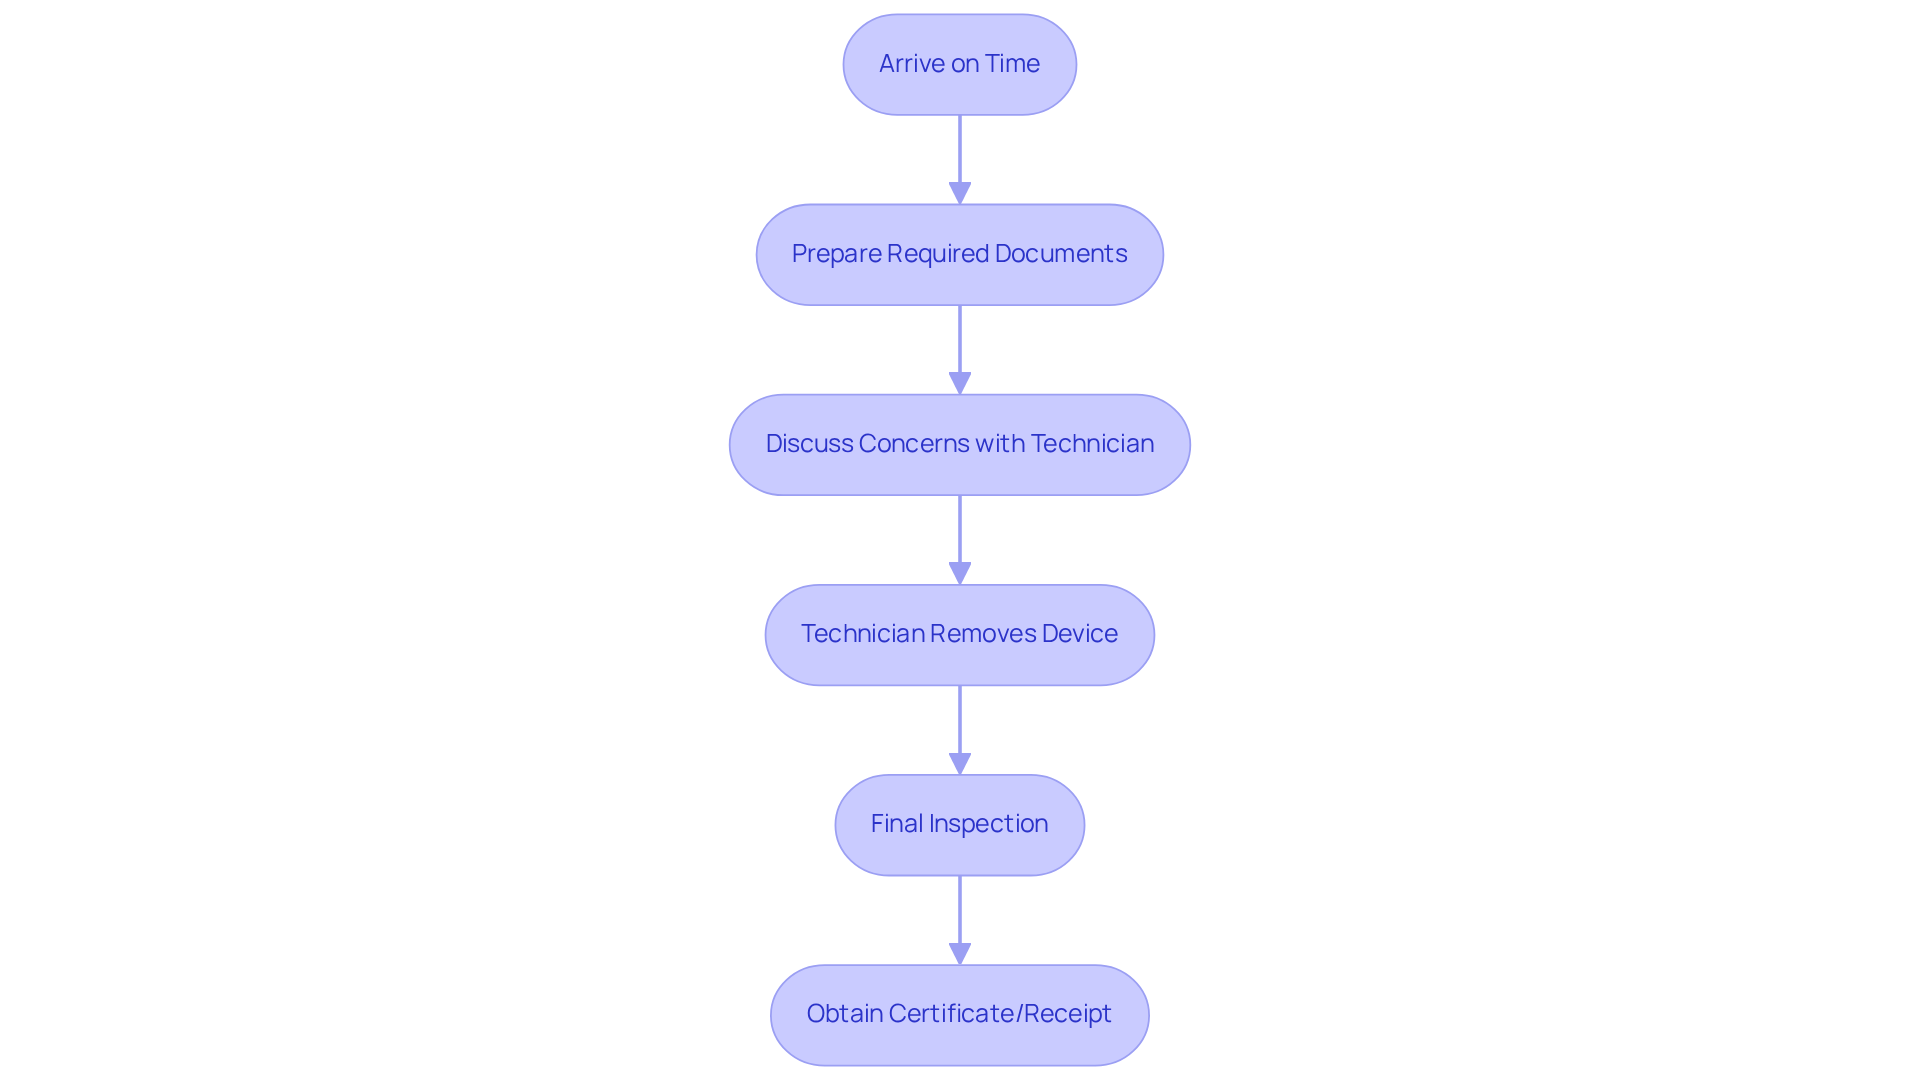
- Try to arrive on time: This can help ease any worries about delays in the extraction process.
- Having your required documents ready: This can help you feel more prepared and confident. Make sure to bring your authorization for departure and any identification needed by the service provider.
- Take a moment to discuss your concerns with the technician: They are there to help you and will verify your compliance while reviewing your records to ensure you meet the requirements for removal.
- The technician will carefully remove the ignition interlock system: They’ll ensure everything is handled with care to avoid any damage.
- After the device is removed, the technician will check everything: This final inspection confirms that your vehicle is safe to drive.
- Make sure to get a certificate or receipt as proof of the successful removal: This documentation is important for your records and may be required by the DMV.
By following these steps on how to remove the ignition interlock device, you can ease your worries and ensure a smooth extraction process, minimizing the risk of complications. It’s important to note that the average expense for IID removal typically ranges from $80 to $160, which is about half of the installation cost. Additionally, compliance with state regulations is essential; neglecting these can lead to extended IID lease requirements or additional fines. Tampering with an IID can result in severe consequences, including loss of driving privileges and hefty fines. By ensuring all steps are followed correctly, you can regain your driving freedom and peace of mind, knowing you’ve done everything right. Remember, the rise in alcohol-impaired driving fatalities by 31% from 2019 to 2021 highlights the significance of adhering to the IID disengagement process properly for public safety.
Confirm Removal and Settle Accounts
Learning how to remove ignition interlock device is just the first step in reclaiming your driving freedom, but it can feel daunting. After understanding how to remove ignition interlock device, confirming its removal and settling any outstanding accounts is crucial for ensuring compliance and restoring your driving privileges.
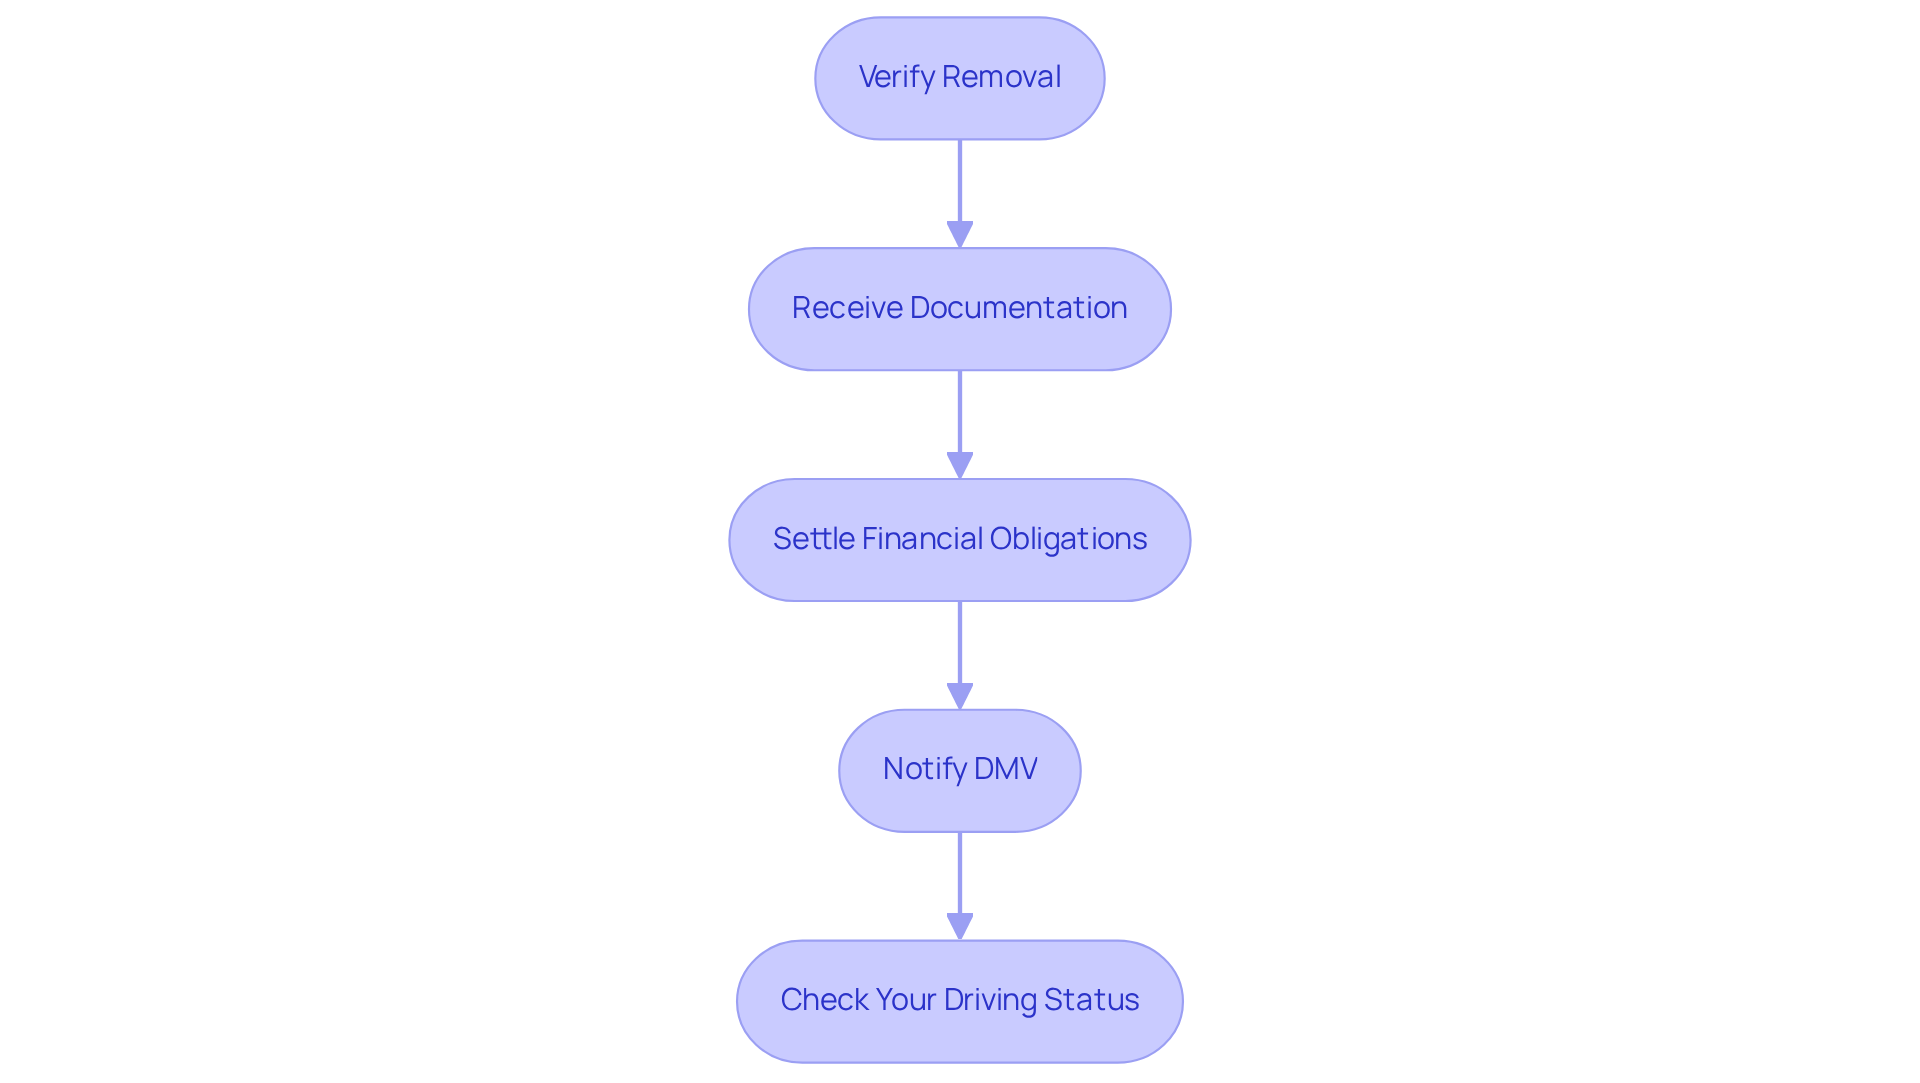
- Verify Removal: Take a moment to look over the installation area and make sure everything has been completely removed. This ensures that no components are left behind.
- Receive Documentation: Obtain a certificate or receipt from the service provider. This document serves as evidence of how to remove ignition interlock device and may be necessary for your records or future legal requirements.
- Settle Financial Obligations: Make sure you’ve settled all charges related to the installation and removal of the device. This includes installation fees, monthly monitoring charges, and any disposal costs. Many states offer financial assistance programs to help cover these costs, so be sure to ask about any available options.
- Depending on state regulations, you may need to inform the DMV about how to remove ignition interlock device. This often involves submitting the cancellation certificate or other necessary documentation. Many people feel overwhelmed and forget to notify the DMV after disconnecting the device, which can complicate their path back to driving freely.
- Check Your Driving Status: After confirming the removal and settling accounts, verify your driving status to ensure that your license is no longer restricted by the ignition interlock requirement.
Completing these steps is essential, as failing to notify the DMV can lead to unnecessary complications and delays in regaining your driving freedom. Taking these steps not only ensures compliance but also paves the way for a smoother return to the road.
Conclusion
Navigating the removal of an ignition interlock device can feel daunting, but it’s a crucial step toward reclaiming your driving freedom. Understanding the requirements, scheduling the removal appointment, and completing the necessary steps empower you to move forward with confidence. By understanding the steps and requirements, you can confidently navigate the process and avoid any unnecessary hurdles.
Key insights from this article highlight the importance of:
- Completing the monitoring period without violations
- Obtaining the necessary authorizations
- Preparing for the removal appointment
Each step, from confirming the appointment to settling any financial obligations, plays a vital role in ensuring a smooth transition back to unrestricted driving. Remember, maintaining clear communication with your service provider and the DMV is essential for a successful removal process.
This journey is about more than just getting back on the road; it’s about embracing responsible driving and taking charge of your future. By following the outlined steps and understanding the significance of each requirement, you can reclaim your driving privileges with confidence. Taking action today not only facilitates a return to the road but also contributes to a safer driving environment for everyone.
Frequently Asked Questions
What are the general requirements for removing an ignition interlock device (IID)?
The general requirements include completing the monitoring period, maintaining a clean record with no violations, obtaining written authorization from the court or monitoring authority, and gathering necessary documentation.
How long must the IID be installed for first-time offenders?
For first-time offenders with a blood alcohol concentration (BAC) of 0.15 or higher or if a minor was present, the IID must be installed for a minimum of six months.
What is the IID installation requirement for second DUI convictions?
For second DUI convictions, the IID must remain installed for at least one year, or two years if the BAC was 0.15 or higher or a minor was present.
What is the significance of maintaining a clean record during the monitoring period?
Maintaining a clean record is essential as it means no failed breath tests or tampering incidents. Each violation is recorded, and repeated offenses can complicate the process of regaining driving privileges.
What steps must be taken to obtain authorization for IID removal?
You need to obtain written authorization from the court or your monitoring authority, which may involve submitting a request or application for elimination.
What documentation is required for the IID removal process?
Important documents that show you’ve met all the requirements must be gathered. This documentation is essential for verifying adherence to all mandated conditions.
Who must install the IID before a driver’s license can be reinstated?
The IID must be installed by a state-approved vendor before a driver’s license can be reinstated.
Charged with a crime?
Charged with OUI or DUI in Massachusetts?
Attorney Michael R. Reinhardt offers free, confidential consultations across Middlesex, Suffolk, and Worcester counties.
More on OUI / DUI Defense
How we handle OUI / DUI Defense OUI / DUI Defense
Checklist: Key Steps for Your DUI Without Breathalyzer Defense
Navigate your DUI defense without a breathalyzer with key steps and essential evidence insights.
Read article OUI / DUI Defense
Why You Need a Burlington Criminal Defense Attorney for DWI Cases
Secure your future with a Burlington criminal defense attorney for effective DWI representation.
Read article OUI / DUI Defense
4 Key Facts on Breathalyzer Tests Without Probable Cause
Discover if you can be breathalyzed without probable cause and the legal implications involved.
Read article